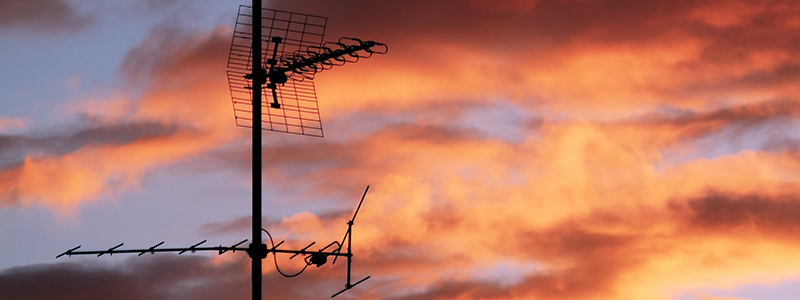
One of the most effective resources available to a cable/cord cutter is free over-the-air (OTA) TV. Without a cable or satellite subscription, you may watch all the free TV you want with an over-the-air antenna.
Suppose you are hesitant to try OTA TV because you like to watch your favorite shows on your own schedule. In that case, you’ll be relieved to know that it is possible to record free OTA television.
Furthermore, with an antenna and an OTA DVR, you may not only record and replay movies and shows, but you can even stop and rewind live TV.
This article will teach you how to record over-the-air television. But first, let’s look at the definition of OTA TV.
What is an Over-the-Air TV
Simply, OTA TVs are television sets that transmit local television channels. To see these channels, you need an OTA TV as well as a digital antenna, as opposed to cable TV or some subscription bundle. In OTA TVs, there are no monthly fees or subscriptions.
OTA television is a low-cost option to access weather stations, local news, and specific primetime television programming.
How to Switch to OTA TV
It is simple to go from satellite or cable to free OTA television.
First, you’ll need to purchase an antenna. You may use the Federal Communications Commission (FCC) DTV Reception Maps to see which channels you should be capable of seeing and how powerful the signals should be.
Link the finest antenna for the setup to your existing TV once you have purchased it. Next, use your TV to search for channels and, if required, change the antenna location and rescan until you are satisfied with the reception.
How to Record Over-the-Air TV
When you connect an antenna to your television, you are connecting it to a TV tuner, which scans the OTA television transmissions picked up by the antenna. It then shows them on your TV. That means you can’t do much more than enjoy free OTA TV; recording it is out of the question if all you have is a television and an antenna.
One such sort of equipment is the OTA DVR. An OTA DVR is nothing more than an antenna DVR. It includes an input for your TV source (simply plug in the antenna) and records to a hard disk drive, enabling you to retrieve that recording afterwards and play it on-demand, like a standard DVR.
OTA DVR Setup
There are several DVRs on the market. You’ll find a coaxial jack somewhere on the item, which is what you connect one of these into:
There’s one on your over-the-air antenna, so that’s what you’ll connect to the OTA DVR’s coaxial port.
Then you will need a hard disc to keep all of the great footage you’ll be capturing. This is included in certain versions; in others, you’ll need to rely on an external hard drive, which you’ll have to purchase separately.
How to Record Using OTA DVR
It is critical to read the exact instructions for your DVR (digital video recorders) because the features and functionalities differ greatly across manufacturers and models. However, after you’ve completed the basic setup, you should be able to start utilizing your OTA DVR straight immediately.
Most DVR remote controls have a Record or REC button. Press this button to record the show you’re currently watching. The DVR will record the full episode even if it has already begun if you started viewing the show from the beginning. However, you may be required to begin recording within a specific time frame, such as 30 minutes into the presentation.
Even if you are not recording the show, you can generally pause or rewind it. However, you need to acquire a blank tape to record because a DVR set will preserve your episodes on its hard disc.
A DVD recorder is another alternative. You must purchase a blank DVD. They can hold films of reasonable quality, but not the greatest by today’s standards of 4K (or even 1440p).
If you want high quality, acquire a Bluray recorder/player, which is far more expensive than a blank Bluray disc. DVR is arguably the greatest choice in terms of convenience and quality. However, DVR systems are not inexpensive.
How to Record Over-the-Air TV Without a Cable
Many DVRs are now of two kinds: standard cable provider set-top boxes (which you do not own) or third-party devices such as TiVo. Both of these things negate the goal of severing the chord.
But, a PVR, or Personal Video Recorder, is a fancy OTA digital tuner with a USB interface for an outer USB hard drive and a very simple VCR-like system software.
For instance, we will look at Homeworx PVR in this article.
HomeWorx PVR
These are the steps to take for setting up your HomeWorx PVR:
- Attach the coaxial cable from your TV to the coaxial antenna input just on the backside of the PVR.
- Link an HDMI cable from the PVR’s HDMI out connection to the HD television’s HDMI input.
- Connect the PVR’s AC power wire to a wall socket.
- Switch on your HDTV and change the video input to the HDMI input that the PVR is using.
- Select “Select Language,” “Select Country,” and “Search Channel” on the PVR. The channel scan will commence automatically.
You will also require an external USB hard drive. Although the PVR’s front-facing USB connector is USB 2.0, you may use a contemporary self-powered USB 3.0 hard drive. Use a drive with a capacity of less than 1 Terabyte.
The disc should be formatted in the “Windows NTFS” format. For the formatting, you may use any Windows PC or the PVR’s menu settings. (Refer to the device’s supplied handbook.)
From here, you may program your PVR much like an old-school VCR from the 1980s.
The UI is simple, but it gets the job done.
Set the PVR timer
- On the remote, press the “Timer” button.
- On the remote, press the “1” button.
- Scroll down to the channel, date, time, and frequency selections by using the arrow keys.
- When finished, press the “OK” button.
- To quit the menu system, use the “Exit” key.
After that, simply continue the recording instructions outlined above.
Conclusion
With the correct DVR, free over-the-air TV may be readily recorded. There are several solutions that may accommodate practically any arrangement and budget.
While attractive, high-end choices are significantly more expensive than a simple low-end model, low-end devices can still be used if you’re on a tight budget, but you should be aware of their limits and whether any additional hardware, such as an external hard disk or flash drive, is required.
The majority of affordable devices lack internal storage and instead store their recordings on external flash drives. Now you understand how to record over-the-air TV. You can record all of the over-the-air programs you want to watch and watch them whenever you want with the correct DVR.